UPDATED 2024. Halloween Time is one of our favorite times of year at Get Away Today, and we love making the most of the season. But on top of that we also love exploring all the thrilling and chilling Halloween happenings in Southern California and in Orlando.
If you’re going to Oogie Boogie Bash at Disneyland, Mickey’s Not So Scary Halloween Party at Magic Kingdom, or any festive events this fall, it’ll be even more fun to add in some of these crafts and countdowns to the season.
Mickey's Pumpkin Dice Game Halloween Craft
Carve up a little bit of pumpkin fun! With this tutorial, you can create your very own Pumpkin Patch Mickey Game with just a few pieces of felt and our free printable dice template. Mickey makes every holiday fun, especially Halloween time!
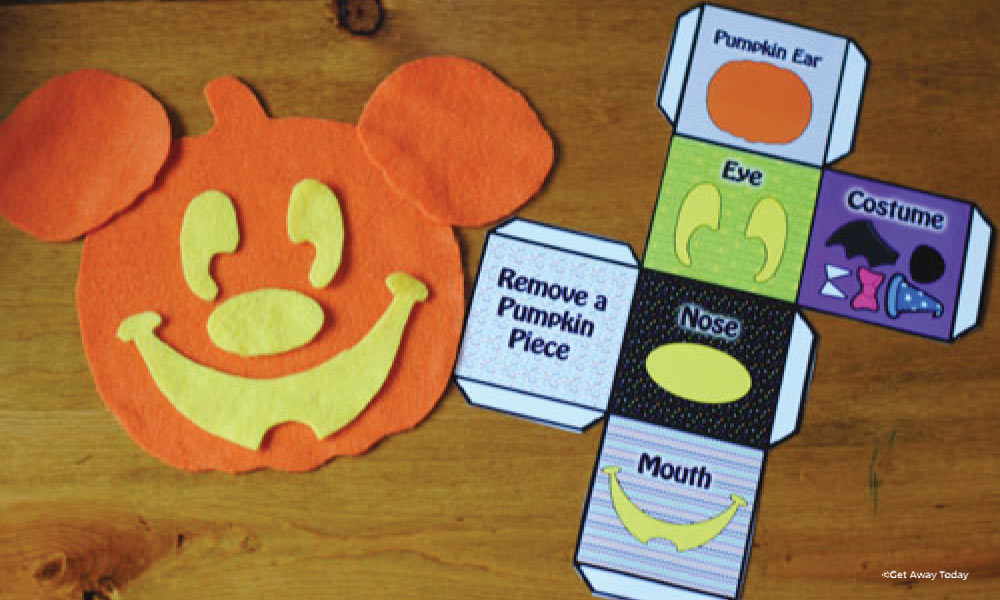 Check out the spook-tacular pumpkin decorations at the Disneyland resort this fall. See how many pumpkin Mickey's you can find during your stay. It is certainly an ear-ry sight.
You will need:
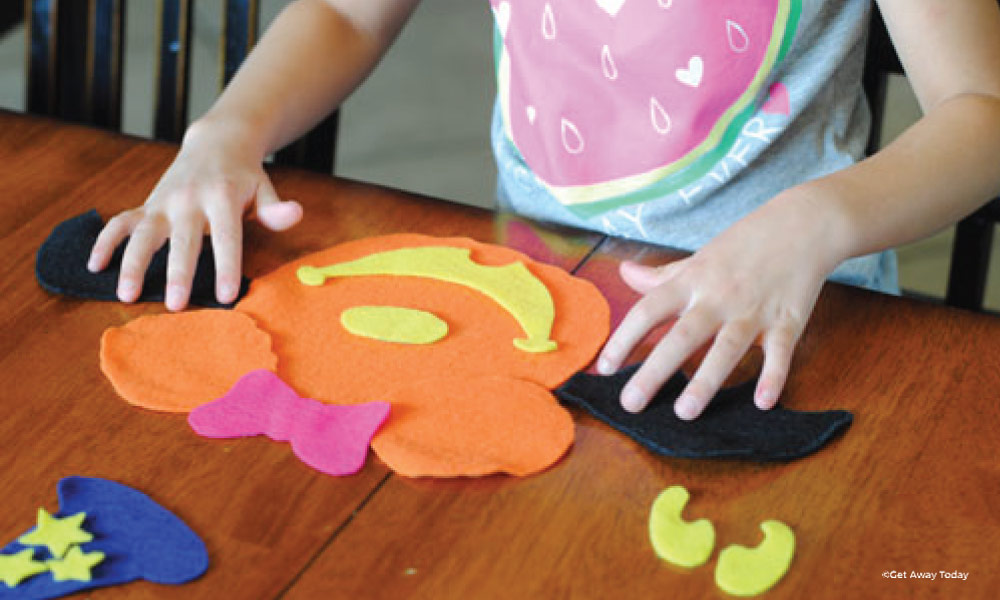 To make the game dice, print the template onto 11 x 17 inch paper. You can use standard printer paper if you want, but the dice will be smaller than the one shown in the photos. It will still work just fine.
Cut around the border of the dice. Fold it into a cube by following the lines on the pattern. Make a tight crease in the paper on all of the solid black lines.
Place a piece of double-sided tape onto the tabs and then stick the edges together.
The dice will be a nice cube when it is finished.
Playing the game is very simple! Each player starts with a Mickey pumpkin head. Then, they take turns rolling the dice. Each side of the dice is associated with a piece of the pumpkin face. The player gets to build their own Mickey pumpkin according to the roll of the dice. For example, if the player rolls the dice and it lands with the "Eye" showing, then they get to add an eye to their pumpkin face. The play continues around in the circle with each player taking turns rolling the dice and adding items to their pumpkin.
Place the Halloween costume pieces in the center of the play circle. If the dice shows the "Costume" picture, then the player gets to choose a costume accessory to add to their pumpkin. If the "Costume" picture is rolled numerous times during the game, the player can either switch costumes or just add additional costumes to their pumpkin. If the player rolls an item that is already on their pumpkin, then they don't get to play that turn. The player to build a complete Mickey Pumpkin first, wins!
This game is appropriate for boys and ghouls of all ages!
 Check out the spook-tacular pumpkin decorations at the Disneyland resort this fall. See how many pumpkin Mickey's you can find during your stay. It is certainly an ear-ry sight.
You will need:
- 5 Orange Felt Squares
- 1 Black Felt Square
- 1 Navy Felt Square
- 2 Yellow Felt Squares
- 1 Pink Felt Square
- Scissors
- Marker
- Double Sided Tape
- Mickey Pumpkin Pattern
- Mickey Pumpkin Parts Pattern
- Mickey Pumpkin Extras Pattern
- Mickey Dice Printable
- one pumpkin head
- two pumpkin ears
- two eyes
- one nose
- one mouth
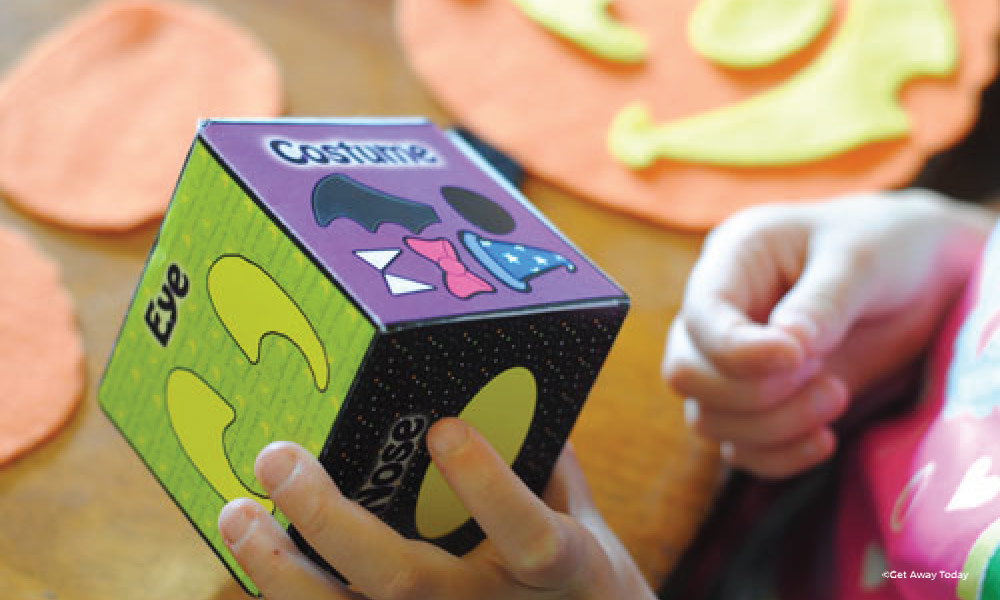
 To make the game dice, print the template onto 11 x 17 inch paper. You can use standard printer paper if you want, but the dice will be smaller than the one shown in the photos. It will still work just fine.
Cut around the border of the dice. Fold it into a cube by following the lines on the pattern. Make a tight crease in the paper on all of the solid black lines.
Place a piece of double-sided tape onto the tabs and then stick the edges together.
The dice will be a nice cube when it is finished.
Playing the game is very simple! Each player starts with a Mickey pumpkin head. Then, they take turns rolling the dice. Each side of the dice is associated with a piece of the pumpkin face. The player gets to build their own Mickey pumpkin according to the roll of the dice. For example, if the player rolls the dice and it lands with the "Eye" showing, then they get to add an eye to their pumpkin face. The play continues around in the circle with each player taking turns rolling the dice and adding items to their pumpkin.
Place the Halloween costume pieces in the center of the play circle. If the dice shows the "Costume" picture, then the player gets to choose a costume accessory to add to their pumpkin. If the "Costume" picture is rolled numerous times during the game, the player can either switch costumes or just add additional costumes to their pumpkin. If the player rolls an item that is already on their pumpkin, then they don't get to play that turn. The player to build a complete Mickey Pumpkin first, wins!
This game is appropriate for boys and ghouls of all ages!

Disney Inspired Halloween Yard Decorations
Have you noticed that the fall leaves pile up outside as fast as laundry piles up inside? Why not make the clean-up fun with a little Disney Magic? Work seems to turn into play when Mickey is involved.
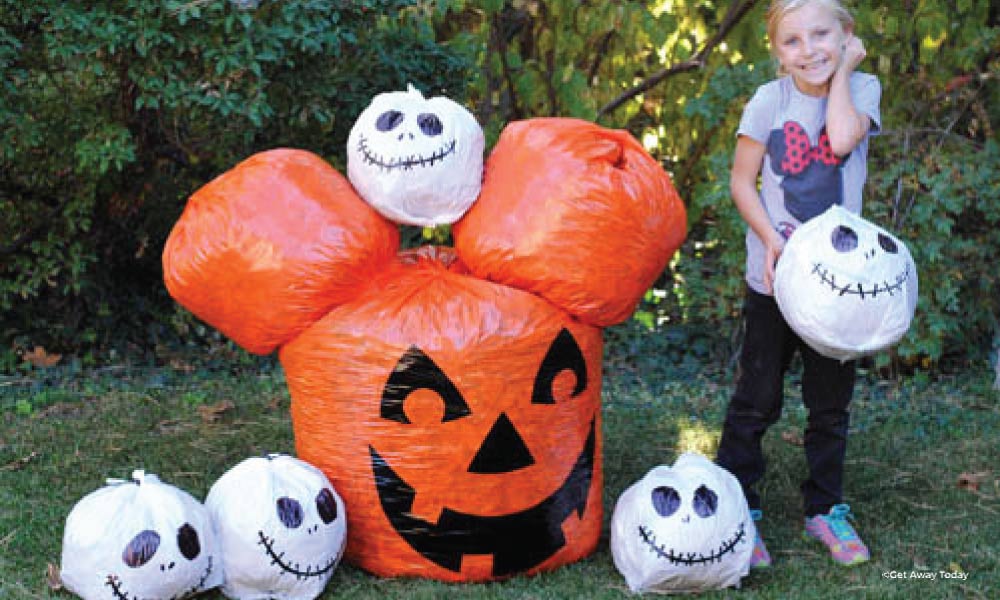
All you need are a few basic things. We ordered some pumpkin leaf bags on Amazon. It had one big pumpkin leaf bag and two small leaf bags in the package. And the bags already had a jack-o-lantern on them! It was perfect for building our Mickey Mouse Pumpkin lawn decoration.
Start by letting your kids rake the leaves into piles. My kids all thought raking was a blast. They spent some time jumping into the piles before we gathered the leaves into the leaf bags.
Once the bags are full, tie the tops closed. The pumpkins are cute just like this, but we thought they would be even more festive as Mickey Mouse.
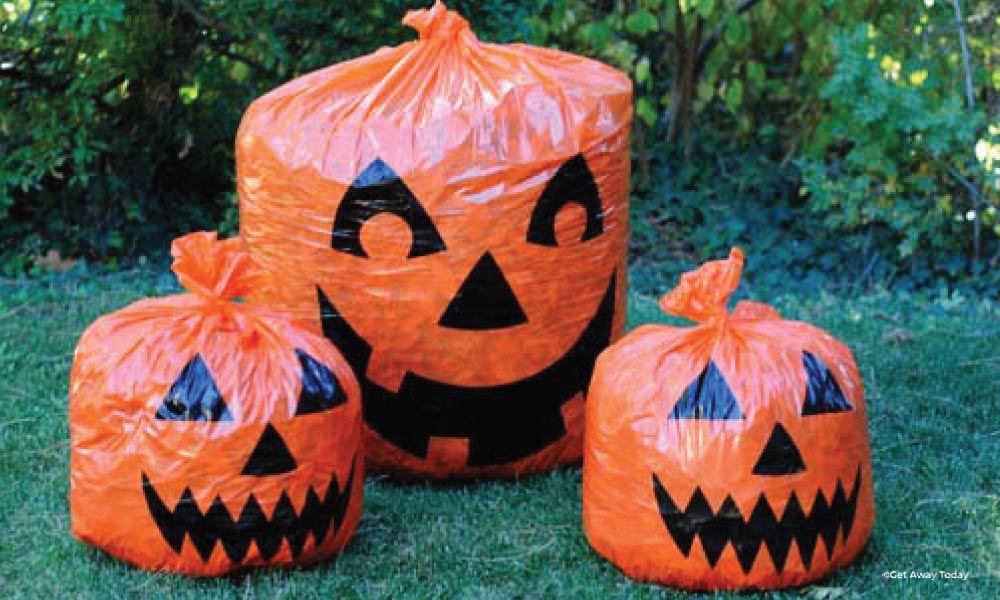 Take a few pieces of Duct Tape and attach three big loops on each side of the big pumpkin head. Then, stick the smaller pumpkin bags onto the big one right on top of the Duct Tape. This makes the Mickey Ears. It's as easy as that! We love turning work into play!
There will likely still be leaves on your lawn, even after the Mickey bags are full, here is another fun way to add some Disney leaf bag decor to your yard - Jack Skellington heads!
Start by drawing the face onto small white 4-gallon trash bags and a giant Sharpie marker.You can look up a photo of Jack Skellington online, or just go off our drawing. It doesn't have to be perfect. Halloween is supposed to be scary. Fill a white bag with leaves and tie it off. Then, tuck it inside your Jack Skellington bag. We found that having a double layer of white trash bags was best.
Tie the bag closed and it is finished!
You can hang the bags from a tree using twine or simply place them around your yard wherever you please. It is certainly an inexpensive and simple way to add some Disney Halloween fun to your house.

Spooky Cones Cars Land Halloween Craft
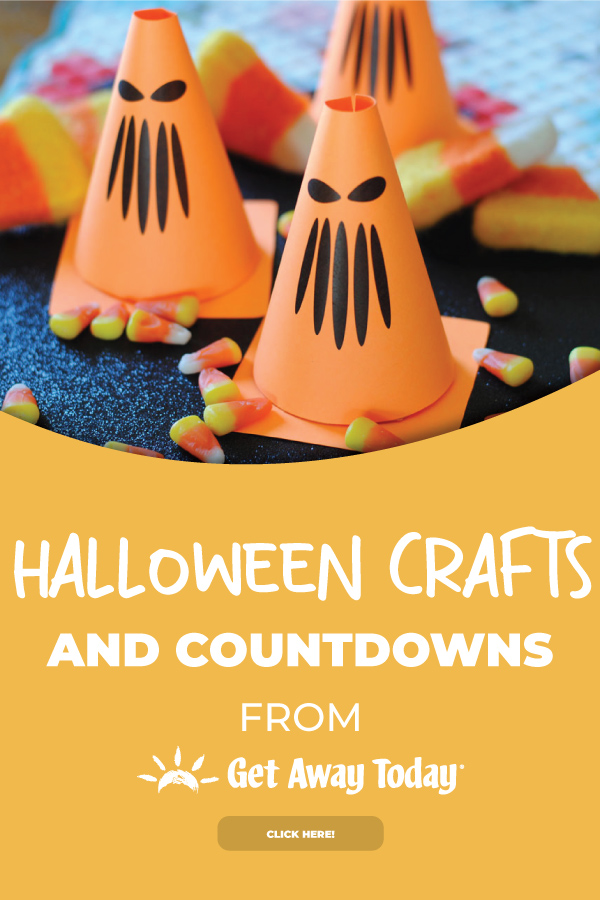
To start, download one of the templates below. We've included two versions; one with black lines and one with orange lines. The orange lines should print out just enough on the bright orange paper so that you can still see it, but it won't be obvious. In case your orange paper is too similar - or you'd simply prefer the easier to see lines - you'll want to download the black line version instead. Either way, the template makes this whole project so easy...it's scary!
Supplies:
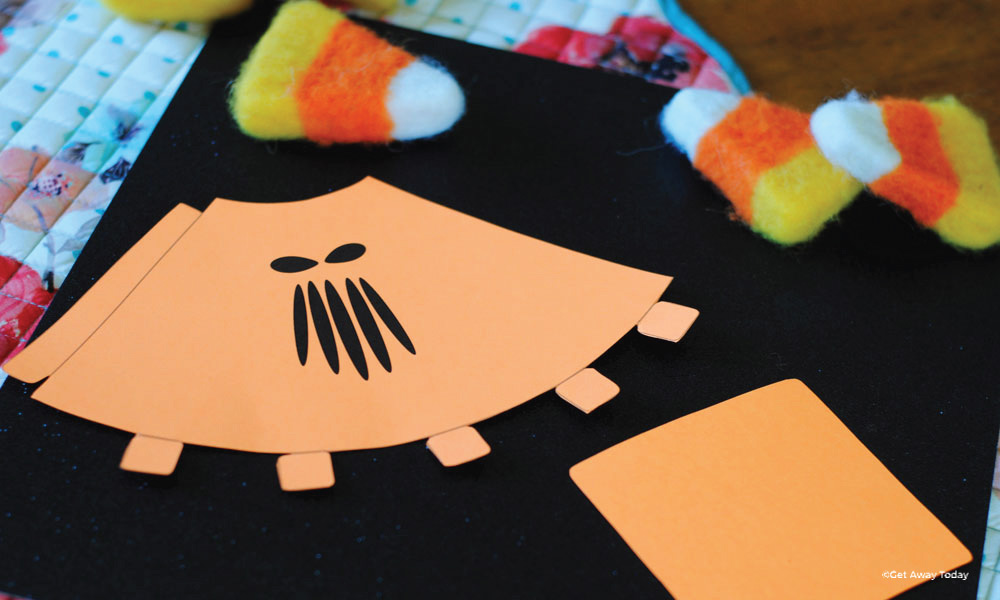 Fold each of the square tabs up so they curl towards the back of the template. They will be folded away from the printed face.
Place little sections of double-sided tape onto each square tab. Then, fold the long skinny tab that is on the side of the cone back – this will also be folded away from the face.
Crease the edge so the fold stays in place. Tape the outside section of the tab with the double-sided tape as well.
Roll the paper into a cone shape. Press the long thin tab into place so it holds the two sides together. Press along the tape to ensure it sticks well.
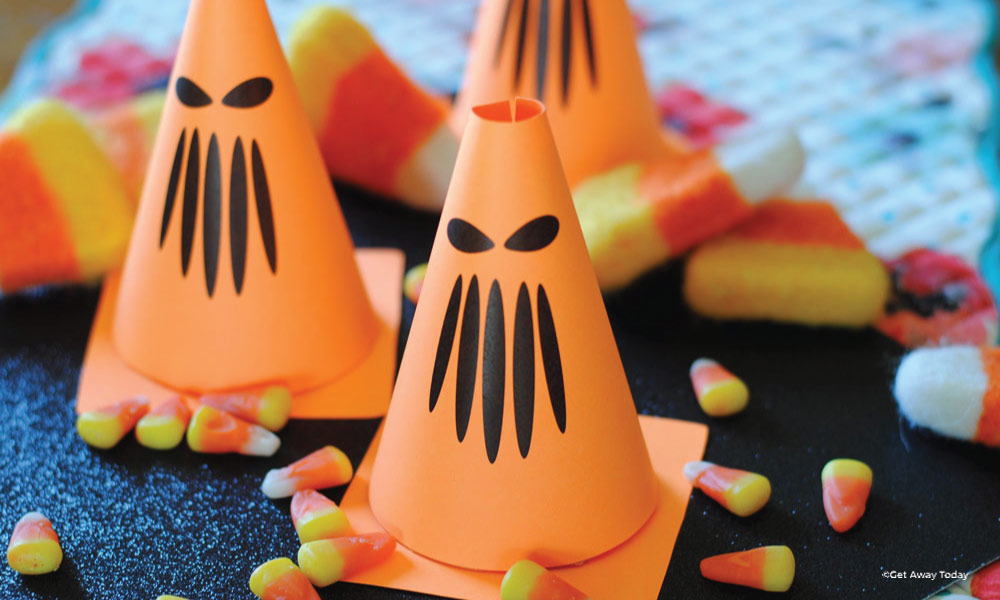
Set the Cars Land Halloween craft onto the square base. Now it looks like a traffic cone – yay!
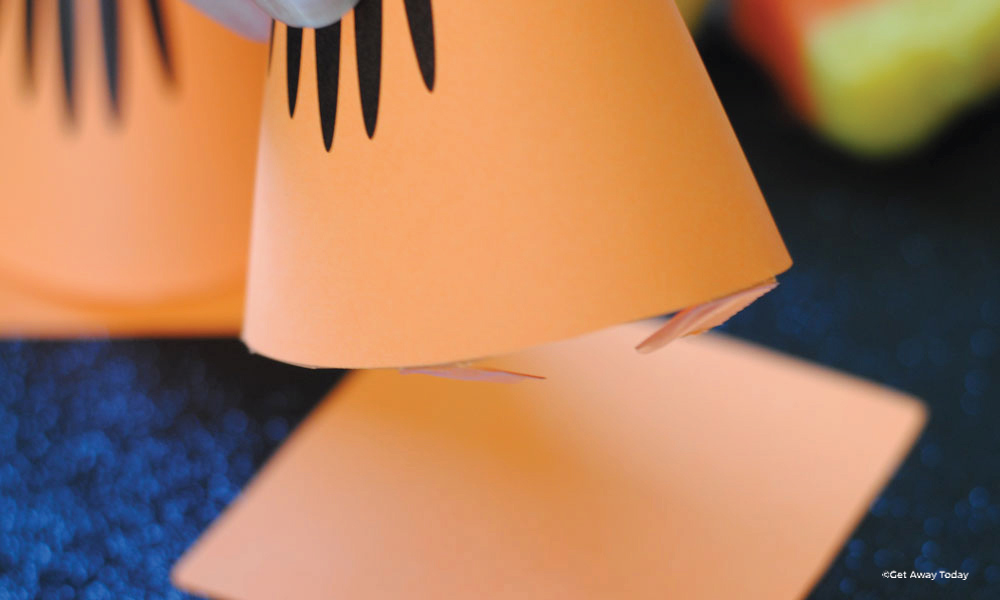 Use the end of a pencil to secure each of the tabs onto the square base. Press down on each one so they don't pop up.
Now, for the best part! Drop a handful of candy corn treats into the top of the cone. Fill the cone as full as you want. What do you think? Is candy corn too sweet or is it just right? I know my kids think they are pretty fantastic.
Use your Cars Land Halloween craft as part of your Halloween decor or as a favor for a fun Halloween party. We hope your family has fun with this Cars Land Halloween craft, too!
- Neon Orange Construction Paper
- Scissors
- Double Sided Tape
- Cars Land Halloween Craft Template - Orange
- Cars Land Halloween Craft Template - Black
 Fold each of the square tabs up so they curl towards the back of the template. They will be folded away from the printed face.
Place little sections of double-sided tape onto each square tab. Then, fold the long skinny tab that is on the side of the cone back – this will also be folded away from the face.
Crease the edge so the fold stays in place. Tape the outside section of the tab with the double-sided tape as well.
Roll the paper into a cone shape. Press the long thin tab into place so it holds the two sides together. Press along the tape to ensure it sticks well.
Set the Cars Land Halloween craft onto the square base. Now it looks like a traffic cone – yay!
 Use the end of a pencil to secure each of the tabs onto the square base. Press down on each one so they don't pop up.
Now, for the best part! Drop a handful of candy corn treats into the top of the cone. Fill the cone as full as you want. What do you think? Is candy corn too sweet or is it just right? I know my kids think they are pretty fantastic.
Use your Cars Land Halloween craft as part of your Halloween decor or as a favor for a fun Halloween party. We hope your family has fun with this Cars Land Halloween craft, too!

Disney Halloween Countdown Chain
Halloween Time at the Disney Parks is quite the treat. Countdown to your not-so-spooky vacation with this Disney Halloween Countdown Chain.
Halloween Time at Disneyland and Walt Disney World is the happiest haunting on Earth. The parks are enchanted with grinning ghosts, spooktacular entertainment, boo-tiful fireworks shows and all sorts of not-so-scary Disney fun! Glowing carved pumpkins line Main Street U.S.A. and frightfully fun decorations are scattered around the lands.
Everyone's favorite villains are out and haunting the parks. Even Mickey gets to dress up and enjoy the Halloween festivities.
The days leading up to a Disney vacation can get pretty scary. Especially at Halloween time! Time slows down. Excitement begins to bubble. The anticipation is crippling. It is torture waiting for the fun to begin! The cure? Adding a little magic into the mix to make the countdown to Disney a fun treat instead of a wicked trick.
This cute Disney Halloween Countdown Chain is perfectly themed for Halloween Time at the parks. Take away a link of the chain each day and watch your departure date creep closer and closer. When all the links have disappeared, it's time for your Disney vacation to begin!
You will need a few supplies to create your own Disney Halloween Countdown Chain:
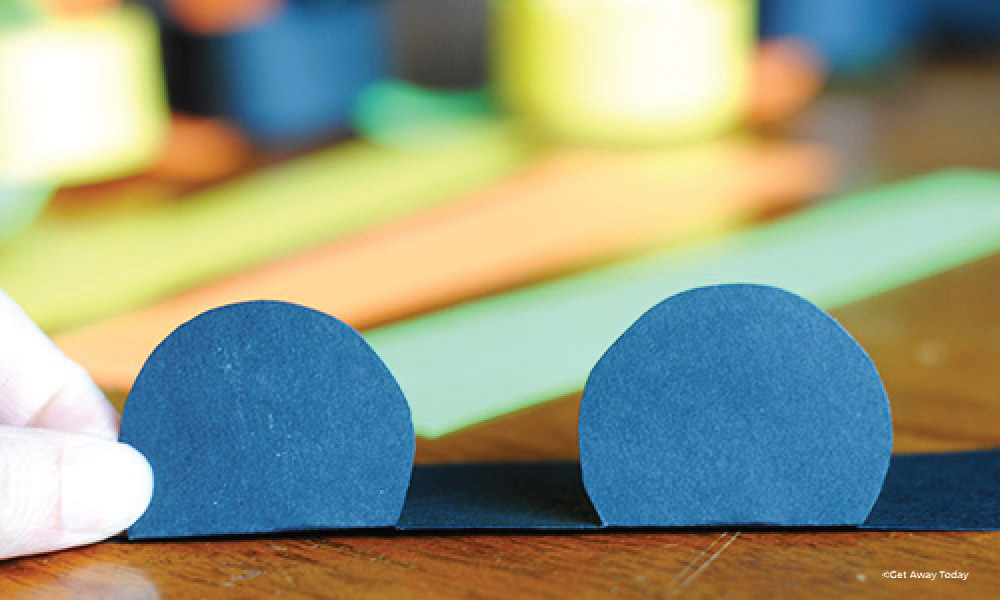 Each link has two Mickey Mouse ears. You want the ears to stand out when you make the Disney Halloween Countdown Chain. Fold the ears up at a 90 degree angle. Crease the fold so it stays in place.
Next, you will cut the strips for the colored portions of the chain. You can use a rotary cutter to make this step easy and fast. Make the yellow and orange strips 1 1/4 inches wide. The green strips are slightly more narrow at 1 inch wide. This helps the green fit between the Mickey ears when you put the chain together.
Once all of the pieces are ready, it is time to build your Disney Halloween Countdown Chain. It is easiest to start with the Mickey Mouse ears link. Fold the paper into a circle and use a stapler to attach.
Then, link an orange strip of paper through the black circle and staple it into place.
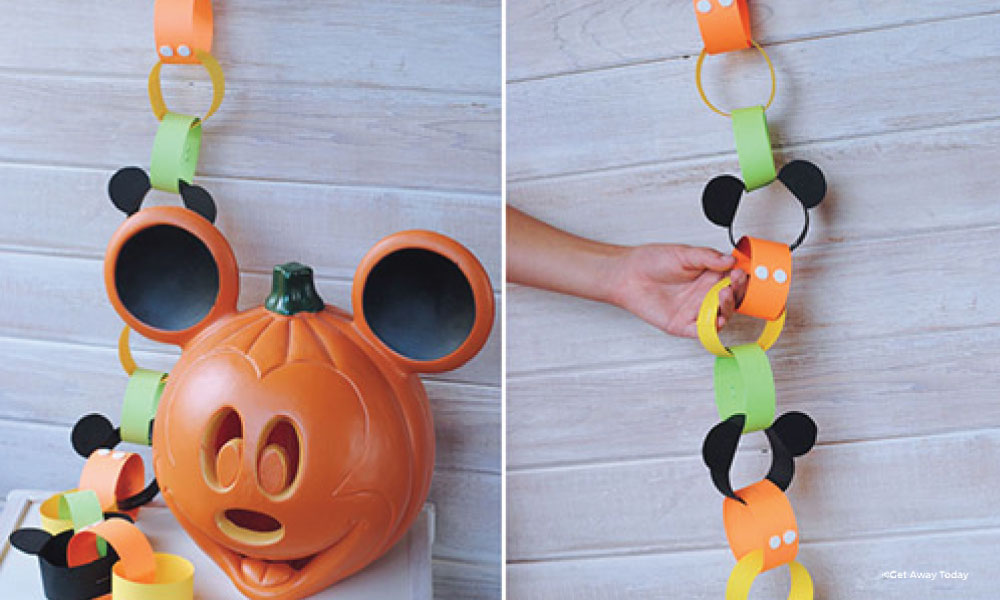
Continue linking paper through the circles in the pattern black, orange, yellow, green. In theory, this link is supposed to be Mickey Mouse! The black is his head, the orange is his outfit, the yellow are his shoes, and the green are his arms. Mickey has some pretty festive costumes during Halloween Time and his orange one is one of my favorites.
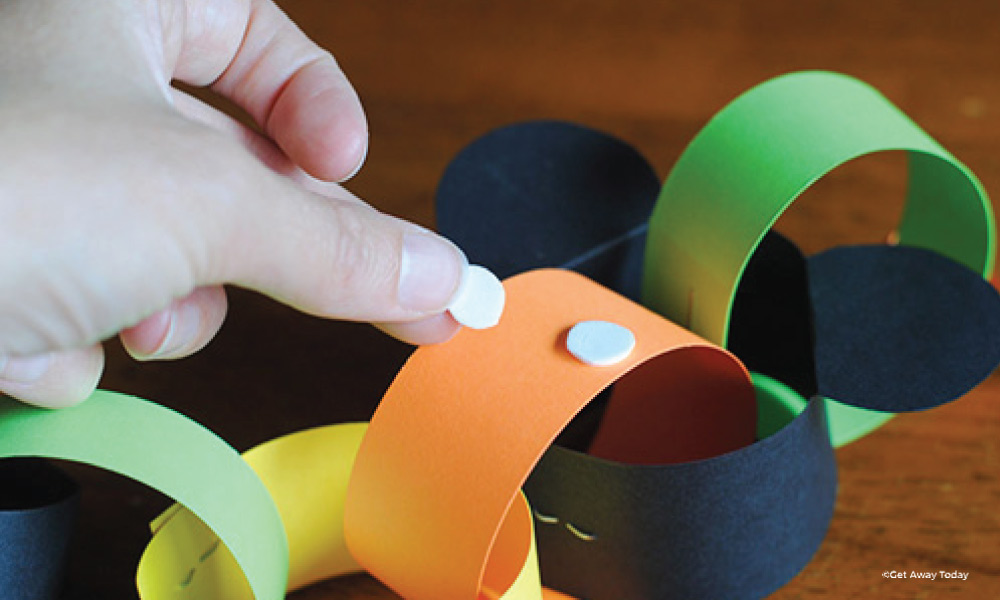
Cut some small white buttons out of regular paper or sticky foam paper. Even white label paper would work as long as it is sticky. Place the little white circles onto the orange links of the Disney Halloween Countdown Chain. This makes Mickey's outfit complete!
 When you have connected enough links to make a proper countdown, add the header to the top of the chain. I think a two to three week countdown is a pretty good amount of time. But, you could even do a month ahead if you want to be extra excited about the Disney vacation!
Add the header by lacing a small bit of ribbon, about 5 inches, through the top link in your chain. Then, tape the ribbon to the back of the header paper.
Hang your finished Disney Halloween Countdown Chain in your house where it is visible. Make sure to take one chain link off per day!
We hope your Disney Halloween Countdown Chain brings some magical Disney fun into your home! Halloween Time at the parks is so festive and frightfully fun. The decorations make for adorable photo opportunities and the events are totally unique to the season. Everything spooky is scaled back to make it appropriate for all ages and scare levels. It's not a trick, but an absolute treat to be part of the Halloween Time magic.
- 2 Sheets of Black Cardstock
- 1 Sheet of Orange Cardstock
- 1 Sheet of Yellow Cardstock
- 1 Sheet of Green Cardstock
- White Foam Sticky Paper
- 5 inches Ribbon
- Scissors
- Stapler
- Tape
 Each link has two Mickey Mouse ears. You want the ears to stand out when you make the Disney Halloween Countdown Chain. Fold the ears up at a 90 degree angle. Crease the fold so it stays in place.
Next, you will cut the strips for the colored portions of the chain. You can use a rotary cutter to make this step easy and fast. Make the yellow and orange strips 1 1/4 inches wide. The green strips are slightly more narrow at 1 inch wide. This helps the green fit between the Mickey ears when you put the chain together.
Once all of the pieces are ready, it is time to build your Disney Halloween Countdown Chain. It is easiest to start with the Mickey Mouse ears link. Fold the paper into a circle and use a stapler to attach.
Then, link an orange strip of paper through the black circle and staple it into place.
Continue linking paper through the circles in the pattern black, orange, yellow, green. In theory, this link is supposed to be Mickey Mouse! The black is his head, the orange is his outfit, the yellow are his shoes, and the green are his arms. Mickey has some pretty festive costumes during Halloween Time and his orange one is one of my favorites.
Cut some small white buttons out of regular paper or sticky foam paper. Even white label paper would work as long as it is sticky. Place the little white circles onto the orange links of the Disney Halloween Countdown Chain. This makes Mickey's outfit complete!
 When you have connected enough links to make a proper countdown, add the header to the top of the chain. I think a two to three week countdown is a pretty good amount of time. But, you could even do a month ahead if you want to be extra excited about the Disney vacation!
Add the header by lacing a small bit of ribbon, about 5 inches, through the top link in your chain. Then, tape the ribbon to the back of the header paper.
Hang your finished Disney Halloween Countdown Chain in your house where it is visible. Make sure to take one chain link off per day!
We hope your Disney Halloween Countdown Chain brings some magical Disney fun into your home! Halloween Time at the parks is so festive and frightfully fun. The decorations make for adorable photo opportunities and the events are totally unique to the season. Everything spooky is scaled back to make it appropriate for all ages and scare levels. It's not a trick, but an absolute treat to be part of the Halloween Time magic.

The magic and excitement of Halloween doesn't have to end here! Halloween Time at Disneyland is already in full force with so many new and spooky adventures. You don't want to miss this limited time spooktacular celebration! Book your Disney package online or call our travel experts at 855-GET-AWAY.


Join the Conversation!
Leave A Comment